Pin This
 One spring afternoon, as sunlight streaked across the kitchen counter, I found myself piecing together the flavors of Pavlova for a friend who had never tasted it. The meringue felt almost magical: light and airy in my hands, like sculpting clouds. The promise of a crisp shell hiding marshmallowy softness made each step feel precious, and the rhythmic sound of the whisk beating egg whites became oddly soothing. Sometimes, cooking something gently sweet invites a sort of quiet confidence. That day, the scent of vanilla and berries hugged the kitchen air, nudging me to slow down and savor each moment.
I remember serving this pavlova at a late-spring patio dinner, surrounded by laughter and lingering conversation. Guests couldn't stop marveling at how the meringue gave way to a soft center beneath a crown of shining berries. Someone spilled a little whipped cream while helping themselves, and we all laughed as the mint garnish ended up on the dog. That evening, dessert became the centerpiece of friendship. The pavlova disappeared so quickly we barely got seconds.
Ingredients
- Egg whites: Room temperature egg whites whip up higher—let them sit for thirty minutes before whipping for the most volume.
- Superfine sugar: This dissolves smoothly into the egg whites, preventing any grainy texture and ensuring glossy peaks.
- Cornstarch: Just a little helps stabilize the meringue's soft center, so it stays marshmallowy inside.
- White vinegar: It’s a secret weapon—vinegar assists with structure, making the meringue sturdy enough to pile on toppings.
- Vanilla extract: Adds warmth and aroma to the base; pure extract makes a noticeable difference in flavor.
- Heavy cream: Cold cream whips fastest and holds its shape; chill your bowl for even better results.
- Powdered sugar: Sweetens the whipped cream without weighing it down—sift for a silky finish.
- Assorted fresh berries: Use whatever’s ripe; mixing varieties gives gorgeous color and tangy-sweet balance.
- Mint leaves: Optional, but they add a cool, aromatic touch that I’ve found always gets compliments.
Tired of Takeout? 🥡
Get 10 meals you can make faster than delivery arrives. Seriously.
One email. No spam. Unsubscribe anytime.
Instructions
- Prepare the oven and baking sheet:
- Set the oven to 275°F and line your sheet with parchment, drawing an 8-inch circle as a guide. Flip the paper over so the pencil doesn’t touch the meringue, then pause for a deep breath before you begin.
- Whip the egg whites:
- Start beating in a perfectly clean bowl, listening for the soft whoosh as the whites expand. Stop when soft peaks gently droop from the beaters.
- Add sugar gradually:
- Sprinkle in one tablespoon at a time and beat until glossy, stiff peaks form—watching it transform is my favorite part.
- Fold in extras:
- Use a spatula to gently combine cornstarch, vinegar, and vanilla, careful not to deflate your hard-won volume.
- Shape the meringue:
- Heap onto your circle, sculpting raised edges with a spoon to make a well—don’t fuss, rustic looks beautiful.
- Bake and cool:
- Bake for 1 hour 15 minutes, then turn off the oven and let the pavlova cool inside with the door ajar. This keeps it from cracking too much.
- Whip the cream:
- Beat cream, powdered sugar, and vanilla until soft peaks form. The scent is pure luxury.
- Assemble and finish:
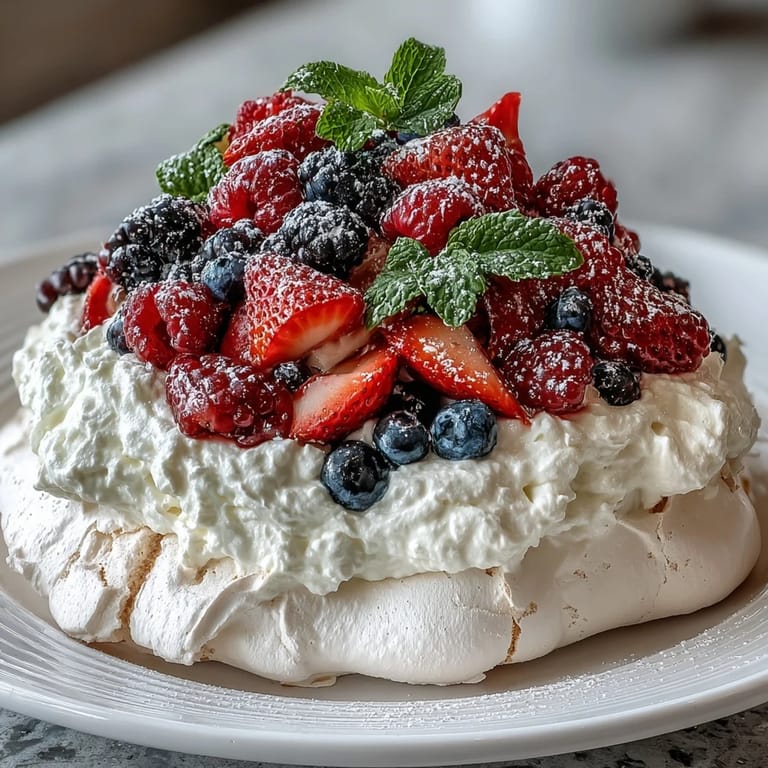
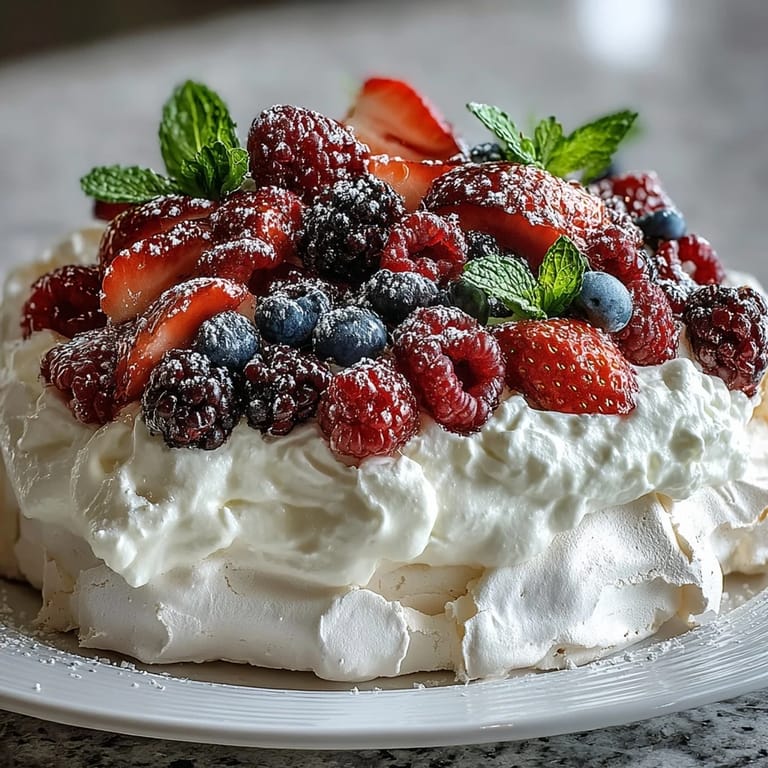
- Once cool, transfer to a platter, spread whipped cream on top, and scatter with berries. Enjoy the moment—you earned it.
- Garnish and serve:
- Add mint leaves if you like, then serve immediately to preserve texture.
 Pin This
 Pavlova became more than dessert for me the night a friend confided in the kitchen, quietly swirling another spoonful onto their plate. Somehow, sharing a slice opened up space for honest conversation, laughter, and late hours spent closer together.
The Joy of Messy Baking
The first time I made this, I worried about getting the perfect shape—turns out, messy meringue looks charming. Letting go of perfection makes baking feel more playful and less stressful. Even the cracks add character. It’s freeing to know that taste wins out every time. After all, dessert is about delight, not precision.
Bringing Color and Flavor to the Plate
Fresh berries bring bursts of color and tang, and choosing different types offers both variety and beauty. I love how some guests pick out their favorites, while others pile on every berry in sight. The contrast of sweet, tart, and creamy makes every bite refreshing. Mint leaves add a hint of cooling freshness that lingers pleasantly. Swapping in seasonal fruit is a fun way to keep the recipe feeling new.
Making Pavlova Ahead Without Stress
Meringue can be intimidating, but you can bake it a day ahead and assemble just before serving without losing quality. Store the shell uncovered in a dry spot—humidity is its worst enemy. Whipped cream keeps well in the fridge, ready to be spread when you need it.
- Never refrigerate the meringue, or it will soften and lose crispness.
- Berries can be prepped shortly before serving for maximum freshness.
- If cracks happen, pile on extra whipped cream and nobody will notice.
 Pin This
 May your pavlova bring color, joy, and good company to your table. There’s nothing like sharing a dessert that’s as beautiful to look at as it is to eat.
Frequently Asked Questions
- → How do I achieve a crisp meringue exterior?
Bake the meringue at a low temperature and allow it to cool in the oven with the door slightly ajar. This prevents cracking and ensures a crisp shell.
- → Can I use other fruits besides berries?
Absolutely! Substitute with seasonal fruits such as kiwi, passionfruit, or peaches for variety and extra flavor.
- → What is the best way to make whipped cream?
Chill your bowl and cream, then beat until soft peaks form. Add sugar and vanilla for gentle sweetness and aroma.
- → Why is meringue sensitive to humidity?
Humidity can affect meringue texture, making it sticky or preventing it from forming stiff peaks. Choose a dry day for optimal results.
- → Is this dessert suitable for gluten-free diets?
Yes, pavlova is naturally gluten-free. Always check ingredient labels to ensure no cross-contamination.
- → Which tools are essential for preparation?
You'll need an electric mixer, mixing bowls, spatula, baking sheet, and parchment paper for successful results.